Contents
Water Filtration Made Easy: Installing an Under Sink Water Filter
Are you tired of dealing with bad-tasting, contaminated drinking water? An under sink water filter could be the solution you’ve been looking for! This easy-to-install filter can remove impurities, such as chlorine, sediment, lead, and cysts, from your tap water, leaving you with clean and refreshing water for drinking, cooking, and more.
With its compact size, an under sink water filter is an ideal option for homeowners who want to improve the quality of their drinking water without taking up valuable counter space. The installation process is straightforward and can be completed in just a few steps. Plus, these filters typically come with long-lasting cartridges that only need to be replaced every six months to a year.
Not only does installing an under sink water filter provide you with better tasting and healthier drinking water, but it also eliminates the need for bottled water, saving you money and reducing plastic waste.
Investing in an under sink water filter is a simple and effective way to promote better health and sustainability in your home. Don’t wait to start enjoying the benefits of clean and fresh water – install an under sink water filter today!

Introduction
Water is an essential part of our lives. Not only is it important for drinking, but also for cooking, cleaning and bathing. However, the water that comes out of our taps may not always be safe to consume. This is where water filtration systems come into play. Under sink water filters are a popular choice for homeowners who want to ensure their drinking water is clean and free of contaminants. In this post, we will discuss the installation process for an under sink water filter.
Step 1: Gather Your Supplies
Before you start the installation process, make sure you have all of the necessary supplies. You will need:
- Under sink water filter
- Adjustable wrench
- Pipe cutter
- Teflon tape
- Bucket or container
Step 2: Shut Off Water Supply
Locate the water shut off valve under your sink and turn it off. If you cannot find the valve, turn off the main water supply to your home.

Step 3: Remove Existing Faucet
Use an adjustable wrench to disconnect the existing faucet from the water supply line. Be sure to use a container to catch any water that may drip out.

Step 4: Install New Faucet
Follow the manufacturer’s instructions to install the new faucet and connect it to the water supply line.

Step 5: Install Filter Housing
Attach the filter housing to the side of your cabinet using screws. Make sure it is securely fastened.

Step 6: Cut and Connect Tubing
Use a pipe cutter to cut the tubing to the appropriate length. Connect the tubing to the filter housing and the new faucet. Use Teflon tape to ensure a tight seal.

Step 7: Turn On Water Supply
Turn on the shut off valve or main water supply to your home. Check for any leaks.

Conclusion
Installing an under sink water filter is a relatively easy and affordable way to ensure your drinking water is clean and safe to consume. With the right supplies and some basic plumbing knowledge, you can complete the installation process in no time. If you’re considering installing an under sink water filter, we hope this post has helped you feel more confident in the process.
Related Posts
Shop now for countertop reverse osmosis filters
Frequently Asked Questions
What is an under sink water filter?
An under sink water filter is a filtration system that is installed underneath your sink. It connects to your existing plumbing and filters your water as it flows through the system.
Why should I install an under sink water filter?
Installing an under sink water filter provides numerous benefits. It removes impurities from your drinking water, such as chlorine, lead, and sediment. It improves the taste and odor of your water, and it can also save you money by reducing the need for bottled water.
What is included in the Water Filtration Made Easy kit?
The Water Filtration Made Easy kit includes everything you need for installation, including the filtration unit, tubing, and all necessary hardware.
How easy is it to install the under sink water filter?
Installing the under sink water filter is very easy. You do not need any special tools or plumbing knowledge. Simply follow the step-by-step instructions provided in the kit.
Do I need to replace the filter?
Yes, you will need to replace the filter periodically. The frequency of replacement will depend on the quality of your water and how often you use the system. Generally, it is recommended that you replace the filter every 6 months to 1 year.
How do I know when it is time to replace the filter?
The under sink water filter is equipped with a filter life indicator that will alert you when it is time to replace the filter. Alternatively, you can monitor the quality of your water and replace the filter when you notice a decrease in the taste or odor of your water.

About Under Sink Water Filter Installation
Under sink water filter installation is a process of setting up a water filtration system under the sink in your kitchen or bathroom. This is the most convenient way to get safe, clean drinking water at home without relying on bottled water.
Benefits of Under Sink Water Filter Installation
The benefits of installing an under sink water filter are:
- You get fresh, purified water right from the tap.
- You save money on buying bottled water.
- You reduce plastic waste and help the environment.
- You can improve the taste and odor of your water.
Types of Under Sink Water Filters
There are different types of under sink water filters available:
- Activated carbon filters: These remove chemicals, sediment, and bad taste from water.
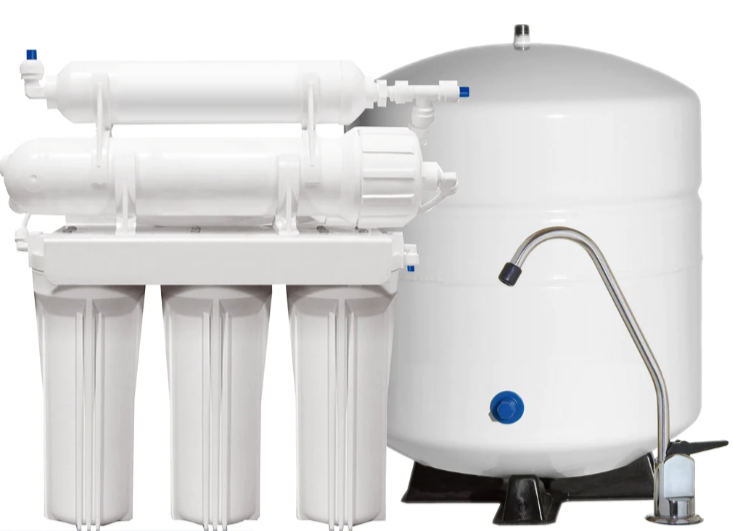
- Reverse osmosis filters: These remove fluoride, lead, and other contaminants from water.
- UV filters: These use ultraviolet light to kill bacteria and viruses in water.
Installation Process
The installation process for under sink water filter is relatively simple and straightforward. However, if you are not comfortable with plumbing tasks, it is recommended to hire a professional.
- Choose the right location under your sink for the filter.
- Install the filter cartridge according to the manufacturer’s instructions.
- Connect the water supply line to the filter.
- Connect the output line from the filter to the faucet.
- Test the system for leaks and proper functionality.
If you have any doubts or problems during installation, consult the manufacturer’s manual or seek professional help.
Conclusion
Installing an under sink water filter is a smart investment for your health, budget, and the environment. Choose the right type of filter for your needs and follow the instructions carefully to ensure a successful installation.
If you want to learn more about water filtration, check out this Wikipedia article on water purification.
Introduction
- An under sink water filter is an effective solution for providing clean and safe drinking water in your home.
- Installing an under sink water filter may seem daunting, but it is actually a relatively simple process.
Step 1: Choose the right filter
- There are different types of under sink water filters, including activated carbon filters and reverse osmosis filters.
- Choose a filter that meets your specific filtration needs and fits your budget.
Step 2: Turn off the water supply
- Before installing the water filter, turn off the main water supply to your home.
- Make sure to relieve the pressure on the water line by opening one of the faucets.
Step 3: Install the filter system
- Follow the manufacturer’s instructions for installing the filter system.
- Most under sink water filters have a separate faucet that needs to be installed on the kitchen sink.
- Make sure to tighten all connections and fittings properly.
Step 4: Test the water flow
- Turn on the main water supply and test the water flow from the new filter system.
- Check for any leaks or drips and make sure everything is working properly.
Conclusion
- Installing an under sink water filter is a simple and effective way to ensure clean and safe drinking water in your home.
- Choose the right filter system, follow the manufacturer’s instructions, and test the water flow to ensure proper installation.
Category – Reverse osmosis and filters