Contents
Upgrade Your Home’s Water System: Tips and Tricks to Remove Your Under Sink Water Filter
If you’re looking to upgrade your home’s water system, one important step is to remove your under sink water filter. This can be a simple task with a few tips and tricks to make the process easier and more efficient.
First, gather all the necessary tools, including pliers, a wrench, and a bucket or towel to catch any water that may spill out during the removal process. Next, turn off the water supply to your under sink filter and release any built-up pressure by turning on the faucet.
Use your pliers to loosen and remove any connectors or clamps that are holding the filter in place. Then, use your wrench to remove the mounting bracket and slide the filter out of its housing. Be sure to dispose of the old filter properly and clean the housing before installing a new one.
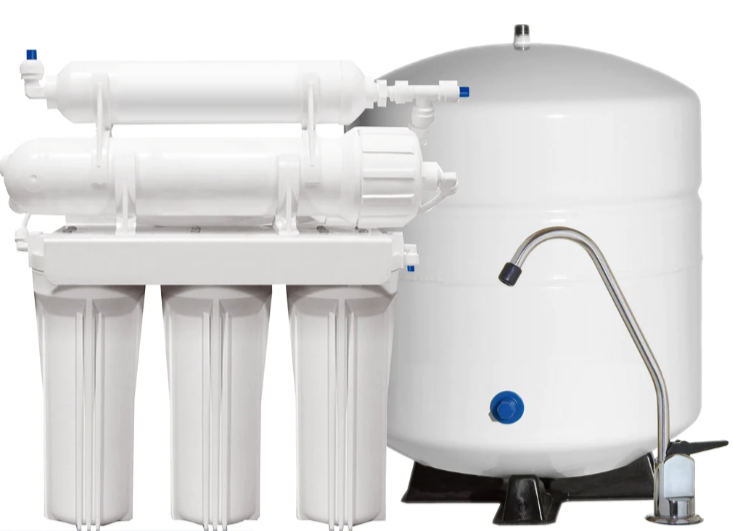
Upgrading your home’s water system can include replacing your old, outdated water filter with a more modern and efficient system. Consider investing in a reverse osmosis system, which can remove up to 99% of impurities and contaminants from your water, providing you with clean, pure drinking water.
Overall, removing your old under sink water filter is an important step when upgrading your home’s water system. By following these tips and tricks, you can make the process quick and easy, and ensure that your family is drinking clean, healthy water.

Why remove your under sink water filter?
Under sink water filters are a popular choice for homeowners who want easy access to clean drinking water. However, over time, these filters can become clogged and may need to be replaced. In this blog post, we’ll share some tips and tricks to help you remove your under sink water filter quickly and easily.
Step-by-step guide to removing your under sink water filter
Before you start, make sure you have everything you need:
- A new under sink water filter
- A bucket or large bowl
- A wrench or pliers
Now, let’s get started:
- First, turn off the water supply to your under sink water filter. You can usually do this by turning a valve located near the filter.
- If your filter is attached to the cold water supply, turn on the cold water tap to relieve any pressure in the system.
- Place a bucket or large bowl under the filter to catch any water that may spill out during the removal process.
- Using a wrench or pliers, loosen the fittings connecting the filter to the water supply lines.
- Carefully remove the filter from under your sink. Be sure not to spill any water that may have collected inside.
- Replace the old filter with a new one, following the manufacturer’s instructions for your specific model.
- Reattach the fittings and turn on the water supply to the filter.
- Turn on the cold water tap and check for any leaks.
When should you replace your under sink water filter?
It’s important to replace your under sink water filter regularly to ensure it’s working effectively. Most filters are designed to last for around six months. However, the lifespan of your filter may vary depending on the quality of your water and how often you use it.
If you notice a decrease in water flow from your filter or a change in the taste or odor of your water, it’s time to replace your filter. Additionally, if you can’t remember the last time you replaced your filter, it’s a good idea to do so as a preventative measure.
Conclusion
By following these simple tips and tricks, you can easily remove your under sink water filter and replace it with a new one. Remember to replace your filter regularly to ensure your water is always clean and safe to drink.
For more information on upgrading your home’s water system, check out our tips and tricks for maintaining your home’s water system.
Keywords: Under sink water filter, clean drinking water, remove filter, quality of water, replace filter, maintain water system.
Shop now for countertop reverse osmosis filters
FAQs: Upgrade Your Home’s Water System
What is an under sink water filter?
An under sink water filter is a device that is installed underneath a sink to purify drinking water from tap water. It uses a multi-stage filtration process to remove impurities, contaminants, and other harmful substances from water.
Why should I remove my under sink water filter?
There are several reasons why you may want to remove your under sink water filter. One reason is that the filter may be old and no longer functioning properly. Removing it may be more cost-effective than repairing or replacing it. Another reason is that you may no longer need it if you have installed a more advanced water filtration system in your home.
What are some tips for removing an under sink water filter?
Here are some tips for removing an under sink water filter:
- Turn off the water supply to the filter using the shut-off valve located near the water source.
- Disconnect the filter from the water supply line and the faucet.
- If the filter is screwed onto the water supply line, use a wrench to unscrew it.
- If the filter is attached with compression fittings, use a wrench to loosen the nut and then pull the fittings apart.
What should I do with the old water filter?
It is recommended that you dispose of the old water filter according to the manufacturer’s instructions. Some filters may need to be recycled, while others can be disposed of with regular household waste.
Can I install a new water filtration system myself?
Installing a new water filtration system can be a DIY project for those with experience in plumbing and electrical work. However, it is recommended that you seek the advice of a professional plumber or electrician to ensure that the system is installed correctly and safely.

How to Remove an Under Sink Water Filter: A Beginner’s Guide
Introduction
If you are looking to remove an under sink water filter, it can be a simple process with the right steps. Follow the below guide to ensure that you remove your under sink water filter safely and easily.
Step 1: Turn Off Water Supply
Before starting, it’s important to turn off the water supply. Look for the valve located near the filter and turn the water off.
Step 2: Disconnect the Filter
The next step is to disconnect the filter from the water system. Use a wrench or pliers to loosen the nut that is holding the filter in place.
Step 3: Remove the Filter
Now that the filter is disconnected, you can easily remove the filter. Simply slide it out from its location under the sink.
It’s important to note that while you are removing the filter, you may find some residual water coming out. Be prepared for this by placing a towel or basin underneath.
Step 4: Clean the Filter
If you are looking to reuse the filter, make sure to clean it thoroughly. Follow the manufacturer’s instructions for cleaning the filter.
Step 5: Reassemble
Once the filter is removed and cleaned, reassemble the water system by reconnecting the filter and turning the water supply back on. Test for any leaks and ensure that the water is flowing smoothly.
Removing an under sink water filter can be an easy and straightforward process. By following the above steps, you can safely and efficiently remove your under sink water filter.
For more information on water filters, visit https://en.wikipedia.org/wiki/Water_filter.
Upgrade Your Home’s Water System
Tips and Tricks to Remove Your Under Sink Water Filter
- Turn off the water supply to the filter
- Release pressure on the filter by opening the faucet
- Disconnect the filter by removing its tubing connections
- Make sure to catch any water that spills
- Remove the mounting bracket or screws that secure the filter
- Take out the old filter and discard it
- Install the new filter using the same steps in reverse order
- Run water through the filter for a few minutes to remove any air and debris
- Dispose of the old filter properly
Category – Reverse osmosis and filters