


")


Contents
Bid Farewell to Impurities: How to Remove Your Under Sink Water Filter Efficiently
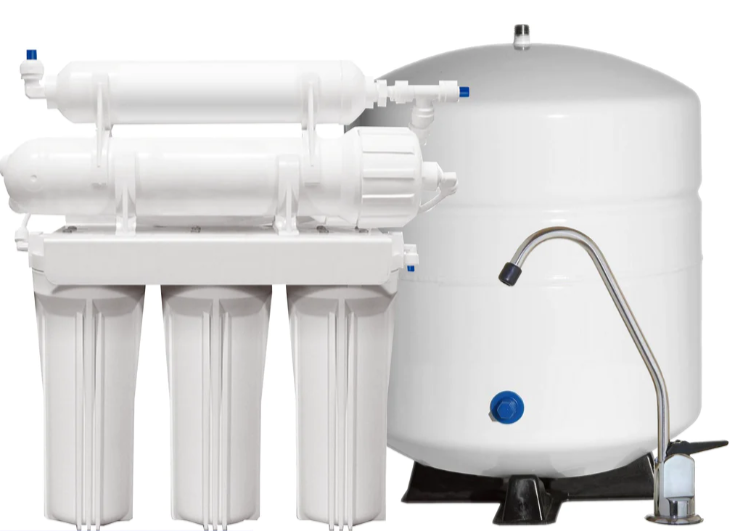
Having an under sink water filter is an excellent way to ensure your tap water is free of impurities. However, after a few months of continuous usage, it’s essential to remove the filter for replacement or cleaning.
Proper maintenance of your under sink water filter will prolong its lifespan and ensure it functions efficiently. Here are the steps to remove the filter:
- Turn off the water supply – Before removing the filter, locate the shut-off valve and turn off the water supply.
- Locate the filter – Under sink water filters are usually located underneath the sink. Once you locate it, ensure it’s easily accessible.
- Remove the filter – To remove the filter, loosen the filter housing with a wrench or plier, then twist it counterclockwise. Once the filter housing is removed, pull the filter out.
- Clean or replace the filter – If the filter is dirty or past the recommended lifespan, it’s advisable to replace it. However, if it’s still in good condition, you can clean it with a soft brush and warm water.
- Reinstall the filter – Once you clean or replace the filter, insert it back into the filter housing, then screw the housing back into place clockwise. Ensure it’s tight enough to avoid leaks.
- Turn on the water supply – Finally, turn on the water supply and let the water run for a few minutes to flush out any trapped air.
Removing your under sink water filter efficiently will ensure your tap water is free of impurities, and your filter functions efficiently. Regular maintenance is crucial for the longevity of your under sink water filter.
Keywords: under sink water filter, remove, efficiently, impurities, maintenance, lifespan

💧 = Use the coupon code SALEG3P800 to save $150 OFF on the 800GPD Tankless RO System with UV Sterilizing Light – Waterdrop G3P800 = 💧![]()
Introduction
Under sink water filters are very popular among homeowners who want to have clean and safe drinking water right at their fingertips. These types of filters are convenient and easy to install, making them a top choice for many households. However, there may come a time when you need to remove your under sink water filter to replace it, clean it or repair it. In this blog post, we will discuss how to remove your under sink water filter efficiently, ensuring that the task is done properly and safely.
Step 1: Turn off the Water Supply
Before you start removing your under sink water filter, you must first turn off the water supply. This will prevent any water from flowing through the filter and spraying all over your kitchen. Locate the valve that controls the water supply to the filter and turn it off.
Step 2: Remove the Screw-on Joints
After turning off the water supply, the next step is to remove the screw-on joints. These joints connect the filter to the water supply line, and you can usually find them right beneath the sink. Use a wrench to loosen the joints and remove them carefully. Be sure to have a bucket or a basin beneath the joints to catch any water that may drip out.
Step 3: Disconnect the Filter Housing
Once you have removed the screw-on joints, the next step is to disconnect the filter housing. The filter housing is usually connected to the cold water line, and you can find it right beneath the sink. Unscrew the filter housing, and you should be able to remove it easily. Be sure to check the housing for any dirt, debris or mildew that may have accumulated over time. You may also want to clean it before reinstalling it or replacing it with a new filter housing.
Step 4: Remove the Old Filter
With the filter housing removed, you can now access the filter itself. Simply remove the old filter and dispose of it properly. Be sure to handle the filter carefully and avoid damaging it, especially if it contains any hazardous materials.
Step 5: Install the New Filter
After removing the old filter, the final step is to install the new filter. Follow the manufacturer’s instructions and insert the new filter into the filter housing. Finally, reassemble the filter housing and the screw-on joints, making sure that everything is tightened properly. You can now turn the water supply back on and test the filter to ensure that it is working correctly.
Conclusion
Removing your under sink water filter doesn’t have to be a complicated task. By following these simple steps, you can remove your filter efficiently and safely, ensuring that your drinking water remains clean and safe. If you have any questions or concerns about removing your under sink water filter, be sure to consult a professional plumber or contact the manufacturer for assistance.
Relevant Keywords: under sink water filter, remove filter, water supply line, filter housing, clean drinking water, hazardous materials, manufacturer’s instructions, plumber
💧 = Use the coupon code SALEG3P800 to save $150 OFF on the 800GPD Tankless RO System with UV Sterilizing Light – Waterdrop G3P800 = 💧![]()
Shop now for Waterdrop N1![]()
Write in HTML FAQs section about Bid Farewell to Impurities: How to Remove Your Under Sink Water Filter Efficiently include H2, H3 headings, do not use H1 heading

Why Removing Your Under Sink Water Filter is Important?
Under sink water filters are essential to ensure that the water you consume is safe and clean. However, over time, these filters can become contaminated with bacteria, chemicals, and other contaminants that can affect the quality of the water. This is why removing your under sink water filter on a regular basis is important.
How to Remove Your Under Sink Water Filter?
The process of removing your under sink water filter may vary slightly depending on the brand and model that you have. However, these are the general steps that apply to most models:
- Turn off the water supply to your filter by closing the valve.
- Disconnect the tubing from the filter unit.
- Remove the filter cartridge from the filter housing.
- Clean the filter housing with soap and water.
- Replace the filter cartridge with a new one.
- Reconnect the tubing to the filter unit.
- Turn the water supply back on.
Why Should You Replace Your Under Sink Water Filter?
It is important to replace your under sink water filter regularly because it can become less effective over time. The filter can become clogged with particles and contaminants, which can reduce its efficiency. To ensure that your water filter is always performing at its best, it is recommended that you replace the filter cartridge every six months.
For more information on water filters and their maintenance, you can visit the Water Filter Wikipedia page.

Bid Farewell to Impurities: How to Remove Your Under Sink Water Filter Efficiently
Introduction
- Under sink water filters are a vital component in ensuring clean drinking water.
- Over time, these filters need to be replaced or removed for maintenance purposes.
- This article will guide you through the steps needed to remove your under sink water filter with ease.
Steps to Remove Your Under Sink Water Filter
- Find the water shutoff valve and turn off the water supply to the filter.
- Disconnect the filter from the water line using a wrench or pliers.
- Remove any mounting brackets or screws holding the filter in place.
- Pull the filter out from under the sink.
- If disposing of the filter, follow proper instructions for recycling or disposal.
Tips for Efficient Removal
- Make sure you have the appropriate tools on hand and a clear workspace.
- If you’re unsure about any steps, refer to the manufacturer’s instructions or consult a professional plumber.
- Label the filter with the date it was removed, so you know when it needs to be replaced.
- Clean the area under the sink after removing the filter to prevent mold or bacteria growth.
💧 = Use the coupon code SALEG3P800 to save $150 OFF on the 800GPD Tankless RO System with UV Sterilizing Light – Waterdrop G3P800 = 💧![]()
Category – Reverse osmosis and filters


