


")


Contents
How to Set Up a Whole House Water Filter System Yourself
Introduction
Are you looking to ensure the highest quality of water for your home? Setting up a whole house water filter system can provide you with clean and safe water for drinking, cooking, and bathing. This guide will walk you through the steps to install a water filter system yourself, saving you money and empowering you to take control of your home’s water quality. You’ll learn about the necessary tools, components, and techniques to achieve a successful setup.

💧 = Use the coupon code SALEG3P800 to save $150 OFF on the 800GPD Tankless RO System with UV Sterilizing Light – Waterdrop G3P800 = 💧![]()
Understanding Whole House Water Filter Systems
A whole house water filter system is designed to filter water at the point of entry into your home. This ensures that every tap and appliance receives clean water. By removing contaminants, these systems improve the taste, smell, and quality of your water supply.
Benefits of Installing a Whole House Water Filter
- Improved water quality for drinking, cooking, and washing.
- Extended lifespan of plumbing and appliances.
- Reduced contaminants, such as chlorine, sediment, and lead.
- Cost-effective solution compared to purchasing bottled water.
Essential Components of a Whole House Water Filter System
Before you begin, it’s vital to understand the essential components of a whole house water filtration system.
Filter Types
Different types of filters are available, including:
- Activated Carbon Filters: Excellent for removing chemicals like chlorine.
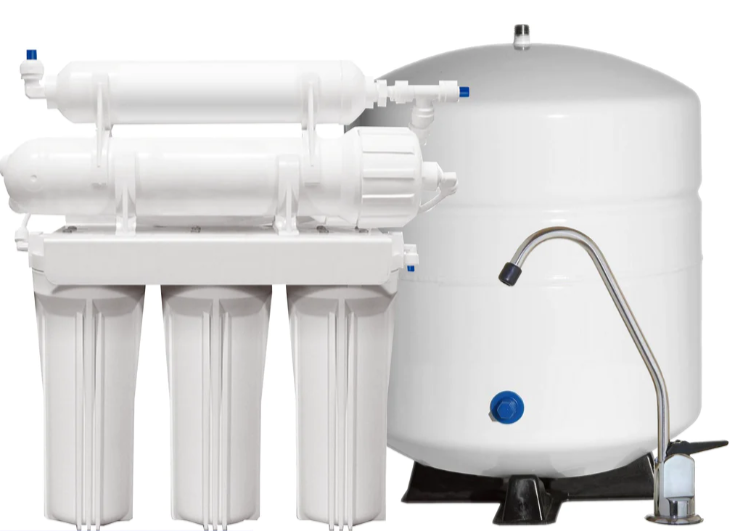
- Reverse Osmosis Systems: Effective for removing dissolved solids and heavy metals.
- Sediment Filters: Ideal for trapping dirt, sand, and rust.
Key Tools Needed
- Pipe wrenches
- Cutter tool for PVC pipes
- Measuring tape
- Pipe fittings and connectors
- Plumber’s tape
Step-by-Step Installation Guide
Step 1: Identify the Location
Choose an appropriate location for the filter system, ideally near the main water supply line. Ensure there’s adequate space for maintenance.
Step 2: Turn Off the Main Water Supply
Before making any changes, turn off the main water supply to prevent leaks and water damage during installation.
Step 3: Cut the Pipe
Using a pipe cutter, cut into the main water line where you will be installing the filtration system.
Step 4: Install the Filter System
Follow the manufacturer’s instructions to connect the filter system using the appropriate fittings and connectors. Make sure to use plumber’s tape on threaded connections to prevent leaks.
Step 5: Turn On the Water Supply
Once everything is securely connected, turn the main water supply back on. Check for leaks around the connections.
Step 6: Flush the System
Run cold water for a few minutes to flush out the system and clear any sediment or carbon dust from the filters.
Maintenance Tips for Your Filter System
Regular maintenance is crucial to ensure your water filter system operates effectively.
Replace Filters Regularly
Follow the manufacturer’s guidelines for replacing filters. Typically, carbon filters should be replaced every 6 to 12 months.
Inspect the System Periodically
Check for leaks and assess the condition of the pipes and connections every few months.
When to Seek Professional Help
If you encounter complex plumbing issues or are unsure about your installation, consider consulting with a professional plumber to ensure a safe and effective setup.
Conclusion
Setting up a whole house water filter system yourself can be a rewarding experience that brings significant benefits to your home. With the right tools and a little knowledge, you can enjoy cleaner, safer water throughout your household.
For more detailed insights and tips, visit this post on water filtration systems.
💧 = Use the coupon code SALEG3P800 to save $150 OFF on the 800GPD Tankless RO System with UV Sterilizing Light – Waterdrop G3P800 = 💧![]()
Shop now for Waterdrop N1![]()
FAQs About Setting Up a Whole House Water Filter System
1. What is a Whole House Water Filter System?
A whole house water filter system is a filtration system that cleans water as it enters your home, ensuring that all taps provide filtered water for drinking, cooking, and bathing.
2. Why Should I Install a Whole House Water Filter System?
Installing a whole house water filter system can remove contaminants such as chlorine, sediment, and heavy metals from your water supply, improving water quality and safety for your family.
3. What Tools Do I Need to Set Up the System?
You will typically need basic plumbing tools such as a wrench, screwdriver, and Teflon tape. Additionally, having a pipe cutter and a level can be helpful.
4. How Do I Choose the Right Filter for My Home?
Consider factors such as your water quality, flow rate, and the contaminants you wish to remove. Testing your water can provide insights into the necessary filtration system.
5. Can I Install the System Myself?
Yes, many homeowners can install a whole house water filter system themselves by following the manufacturer’s instructions. However, if you’re not comfortable with plumbing, hiring a professional is advisable.
6. What is the Installation Process Like?
Generally, the installation process involves shutting off the water supply, cutting the main water line, installing the filter, and securely connecting all fittings before restoring the water supply.
7. How Often Should I Change the Filter?
The frequency of changing the filter depends on usage and the type of filter you purchase. Most filters need replacement every 6 to 12 months.
8. Are There Maintenance Requirements After Installation?
Regular maintenance is usually minimal, but you should check connections for leaks and monitor filter performance periodically to ensure optimal functioning.
9. Can a Whole House Water Filter Affect Water Pressure?
Some systems can reduce water pressure, especially if the filter is clogged. Regular maintenance and timely filter changes can help maintain optimal water pressure.
10. Is Professional Help Required for Troubleshooting?
If you encounter issues such as leaks or poor filtration quality, it is advisable to consult a professional plumber or the filter manufacturer for assistance.

Benefits of Installing a Whole House Water Filter
Installing a whole house water filter system ensures that every tap in your home dispenses clean and safe water. This setup provides numerous advantages:
- Improved Water Quality: Filters out contaminants such as chlorine, sediment, and heavy metals.
- Health Benefits: Reduces the risk of waterborne diseases and exposure to harmful substances.
- Cost-Effective: Saves money in the long run compared to bottled water purchases.
Steps to Set Up Your Whole House Water Filter System
1. Gather Necessary Materials
Before beginning the installation, ensure you have all the required materials. You will need:
- Whole house water filter system kit
- PVC pipes and fittings
- Wrenches and screwdrivers
- Plumber’s tape
- Safety glasses and gloves
2. Locate the Main Water Supply Line
Find where the main water supply enters your home. This is typically located in the basement, crawl space, or utility room.
3. Shut Off the Water Supply
Before installation, shut off the water supply to prevent any leaks or spills during the process.
4. Install the Filter System
Follow the manufacturer’s instructions to attach the filter system to the main water line. It usually involves cutting the pipe, fitting the filter, and securing it in place.
5. Flush the System
After installation, turn the water supply back on and let the filter flush for a few minutes. This ensures that any contaminants trapped during installation are cleared out.
Maintenance Tips
To keep your whole house water filter system functioning effectively, follow these maintenance tips:
- Regularly check and replace filter cartridges as recommended by the manufacturer.
- Inspect for leaks or any signs of wear on the fittings.
- Keep the area around the filter system clean and accessible.
Learn More
For more information about water filtration systems and their benefits, visit the Wikipedia page on water filters.

Summary: How to Set Up a Whole House Water Filter System Yourself
- Research Your Needs:
- Identify contaminants in your water.
- Select the appropriate filter system based on your requirements.
- Gather Materials:
- Purchase the filter system and necessary tools (pipe wrenches, Teflon tape).
- Ensure you have all fittings and connectors required for installation.
- Turn Off Water Supply:
- Locate the main water shut-off valve.
- Turn off the water to prevent leaks.
- Install the Filter System:
- Follow the manufacturer’s instructions for proper installation.
- Connect the system to the main water line, ensuring tight seals.
- Test the System:
- Turn the water supply back on and check for leaks.
- Test the water quality to ensure the system is functioning correctly.
- Maintain Your System:
- Schedule regular filter replacements as per manufacturer guidelines.
- Keep an eye on water pressure and quality over time.
💧 = Use the coupon code SALEG3P800 to save $150 OFF on the 800GPD Tankless RO System with UV Sterilizing Light – Waterdrop G3P800 = 💧![]()
Category – Reverse osmosis and filters


