Contents
Welcome to the World of Steak Carving
Are you looking to up your cooking game and impress your family and friends with your culinary skills? Look no further than mastering the art of steak carving. Carving your own steak not only adds a touch of elegance to your meals, but it also allows you to customize the portion sizes and presentation to your liking.
Why Steak Carving Skills Are Important
Steak carving is a valuable skill to have in your culinary repertoire for several reasons. Firstly, it allows you to control the thickness and size of each steak portion, ensuring that each diner receives a perfect cut tailored to their preferences. Additionally, carving your own steak adds a personal touch to your meal and can elevate the dining experience for your guests.

The Art of Steak Carving
Steak carving is not just about slicing a piece of meat. It is an art form that requires skill, precision, and practice. Mastering the art of steak carving can elevate your cooking game and impress your guests with perfectly sliced and beautifully presented steaks. Here are some tips to help you improve your steak carving skills:
Choose the Right Knife
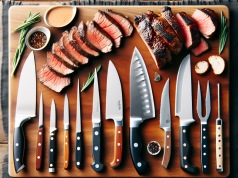
The first step to mastering steak carving is to choose the right knife. A sharp, long-bladed knife with a comfortable handle will make the task much easier. Make sure to sharpen your knife before each use to ensure clean and precise cuts.
Slice Against the Grain
When carving your steak, always remember to slice against the grain. This will result in tender and easy-to-chew pieces of meat. Take your time and use smooth, even strokes to achieve uniform slices.
Let the Meat Rest
Before carving your steak, allow it to rest for a few minutes. This will help the juices redistribute throughout the meat, making it juicier and more flavorful. Cutting into a steak too soon can cause the juices to run out, resulting in a dry and less appetizing dish.
Practice Makes Perfect
Like any skill, mastering the art of steak carving takes practice. Don’t be discouraged if your first few attempts are not perfect. Keep practicing and experimenting with different techniques until you find what works best for you.
Experiment with Different Cuts
Don’t be afraid to experiment with different cuts of steak. Each cut has its own unique texture and flavor profile, so try carving different cuts to discover your favorite. Whether it’s a tender filet mignon or a juicy ribeye, mastering the art of steak carving will allow you to make the most out of any cut of meat.
Conclusion
By mastering the art of steak carving, you can elevate your cooking game and impress your guests with perfectly sliced and beautifully presented steaks. Remember to choose the right knife, slice against the grain, let the meat rest, practice regularly, and experiment with different cuts to find your favorite. With these tips, you’ll be on your way to becoming a steak carving pro in no time.
Mastering the Art of Steak Carving
When it comes to enjoying a perfectly cooked steak, the way it is carved can make all the difference in the world. Here are some expert techniques to help you carve your steak like a pro:
1. Let the Steak Rest
Before you start carving into your steak, allow it to rest for a few minutes. This helps the juices redistribute, resulting in a more flavorful and tender cut of meat.
2. Use the Right Knife
Make sure to use a sharp carving knife or a slicing knife with a long, thin blade. This will allow you to make clean, even slices without shredding the meat.
3. Slice Against the Grain
Pay attention to the direction of the muscle fibers in the steak. To ensure maximum tenderness, always slice against the grain. This will help break up the muscle fibers, resulting in a more tender bite.
4. Cut at an Angle
When carving your steak, slice it at a slight angle rather than straight down. This will help create wider slices and provide a better presentation on the plate.
5. Serve Immediately
Once you have carved your steak, serve it immediately while it is still warm. This will ensure that the meat remains juicy and flavorful.
For more information on steak carving techniques, you can visit Wikipedia’s page on steak.

Frequently Asked Questions
What tools do I need for steak carving?
You will need a sharp carving knife, a cutting board, and a pair of kitchen tongs to help with handling the steak while carving.
Do I need to let the steak rest before carving?
Yes, it is recommended to let the steak rest for a few minutes after cooking to allow the juices to redistribute. This will result in a juicier and more flavorful steak.
How should I carve a steak for presentation?
It is best to carve the steak against the grain to ensure tenderness and to present the slices neatly on a serving platter. Make sure to slice the steak thinly and at a slight angle for the best presentation.
Can I use steak carving skills for other types of meat?
Yes, steak carving skills can be applied to other types of meat such as roast beef, pork loin, and lamb. The same principles of carving against the grain and slicing thinly apply to all types of meat.

Key Takeaways:
- Proper Tools: Investing in a sharp carving knife and a cutting board with a juice groove can make a big difference in your steak carving process.
- Resting Period: Allowing your steak to rest for a few minutes before carving helps retain its juices and enhances flavors.
- Grain Direction: Carve your steak against the grain to ensure a tender bite every time.
- Technique Matters: Use short, smooth strokes to carve your steak and always slice thinly for maximum tenderness.